BELT BUCKLES

Hand cut; hand burned; hand painted

BUCKLE AND BUTTON

Custom orders

COFFEE TABLE

Made with pride

CANOE PADDLES

MOC designed and hand burned

Slide 5 title

ITEM DESCRIPTION.

Monday, August 29, 2011

Brock's Big BIte!

On Sunday, August 14th, I was back in my home town of Beaverton, for Brock's Big Bite.  This was my very first arts festival of any kind, and I was really really excited to be there! My beautiful assistant also accompanied me (Lady of Craft?) to the festival and provided some much needed support and assistance. 

Brock's Big Bite is a long lunch style event that also celebrates local arts, entertainment, delicious food, a farmers’ market, and a historical walk through town. This was Brock's first annual 'Bite', and on most (if not all) accounts, was quite the success! My contact on the planning committee was Jay, and she was very friendly and helpful throughout the day. I got to meet some interesting people, and had a fun day all around!


Here's me and the M.O.C. setup! I'm sure it will evolve, but
it was big enough for what I had with me.


A closer view of the products.


My favourite person, modelling her specs pin and hearts earrings!
(complete with product placement! take note Coke, and pay us. :D )


Here's the real life model of the bottle opener shown here. Awesome!


The Strand Theatre bottle opener. The Strand is a movie theatre in Beaverton,
with a lot of history. Made of Padauk; with a satin finish.


The 'working' side of The Strand bottle opener. Made by cutting
the steel down to size and routing out the wood for a nice inlaid fit.


Sunderland bottle opener. Sunderland was named in 1871, and
used to be called Jones' Corners, by way of the Jones Bros.
Made of Padauk; with a satin finish.


The new inlaid steel plates now used in all M.O.C. bottle openers.
My old elementary school, Thorah Central, just outside of Beaverton,
on Hwy 12.  Made of Purpleheart; with a satin finish.


Opening bottles with a fictional bottling company in Cannington!
Made of Padauk; with a satin finish.


A bottle opener inspired by the Cannington Dog Sled Races.
Made of Purpleheart; with a satin finish.


Now you can open your bottles with Sir Isaac Brock, whom
Brock Township was named after.  Made of Purpleheart; with a satin finish.


This one's a belt buckle based on 'The Old Mill', in Beaverton.
Made of Purpleheart; with a satin finish. Note the richness of the
Purpleheart wood compared to a different batch cut for the bottle
openers. There are a lot of variances between the same wood
depending on what part of the tree it's cut from, and even by
whether it's exposed to light during storage. 


This buckle is basically 'Sunderland' laid of a brick wall look.
Made from Bubinga; with a satin finish.


This buckle is based on the 1973 Ivan Reitman film 'Cannibal Girls',
that was partially filmed in Beaverton. A Canadian horror classic!
Made from Zebrawood; with a satin finish.


Here are the three villages of Brock Township, in pin/button form!
Cannington = Bubinga
Sunderland = Yellowheart
Beaverton = Yellowheart
All have a satin finish.


The backs of the buttons above!


And here were some new pendants also made for the festival. 
From left to right, 'The Beav', 'Sunderland', 'Cannington', 'The Old Mill',
and a jaunty moustached fellow in a bowler cap!

Thanks to my family, and to Uncle Bill Brotherston (a wonderful photographer) for lending his table! Hopefully I'll be back again next year in Cannington!


Best,  

Adam Grant
Man of Craft

The Etsy

I was really excited about Etsy, and I still am! While sales do have room to pick up once word gets out there, I have had some success already and it's encouraging. I've gotten a few nibbles on custom sales too, with one being completed and sent to the USA just last month. :D (you can check out the proof of that one on my Etsy site, under sales!)

Below are some of the items I've got up there right now. If you're interested in any of them, you can only purchase them on the Etsy site.

Parkdale buckle on Bubinga wood, finished with a satin clear coat.

Anchor buckle on Bubinga wood, finished with a satin clear coat.

Buckle Up buckle on Bubinga wood, finished with a satin clear coat.

Skeleton key buckle on Bubinga wood, finished with a satin clear coat.

Leaside's Finest buckle on Bubinga wood, finished with a satin clear coat.
I also sold some cufflinks to a favourite buyer of mine, and I hope the intended recipient loves them!


These 'links weren't burned, but rather left blank to show their
beautiful Bubingan grain. They were finished with a satin clear coat.
I also add some blanks of the three woods that I currently use for buckles. The Zebrawood is hardest to burn on because the grain has many soft spots that are easy to scorch. Careful, careful!

From top to bottom: Zebrawood, Purpleheart, Bubinga.
All are finished in a satin clear coat.
More items will be up soon, from my recent participation in Brock's Big Bite, in Beaverton. (Aug 14, 2011)

Best,
 
Adam Grant
Man of Craft

Early Pyro

A showcase of early burning.

Buckles


These two buckles were the second and third ones ever made.
The 'hand burned' is pretty straightforward to understand, but
the VSS is in homage to the Varsity Sports Store where I work.
As you can see, the first two images were taken just after the
burning was done, and the last is after stain and finish were applied.
Next, I decided to experiment with acrylic paints, buckles for people I knew, and more complex designs.

Shown here are unfinished versions of four soon-to-be buckles.
Three of these will be discussed in the next photo, but the JoJo
Gun buckle is for a friend's band, called... JoJo Gun and the Bullets.
As you can see, I'm a fan of Toronto sports teams! Good or bad,
I cheer for them every year! While the 'LEAFS' was fairly easy,
the Jays design was more challenging and detailed. I was happy
with how it turned out! (and people often ask me where I got it
from :P) My friend Alex and I are in a band called ALPHABAND!

River City is taken from a sweet video game called River City
Ransom, and was done on Basswood, and acrylic paint was used
as the colour. The 'BOOKSTARS' buckle was done on an African
wood called Bubinga, and is one of the first buckles done on a
wood that I didn't need to stain, as the natural colour is quite nice.
Also, if you don't know the Bookstars, you don't know softball!

My confidence was growing, and I took this opportunity to give to a charity golf tournament that I wasn't able to attend this year. My old friend Dave Waller, passed away in 2008, and each year that passes is a year that is without an amazing person. In lieu of attending, I donated a belt buckle and cufflinks set for their annual fundraising raffle. I was happy to give and I can only hope that the set raised some funds for their causes!

These were my first cufflinks! Miss you, Dave! These were
burned on Bubinga, and finished with a semi-gloss clear coat.
Around this time I attended TCAF here in the City. It was amazing just walking around seeing all the talented comics artists! I was tasked to meet a few of my GF's favourite webcomics while I was there, which was pretty fun, but a little nerve racking for this guy being as shy as I am sometimes.

One of the artists was the talented Erika Moen (of Dar, and Bucko fame to name just two). After a signing mix-up, in which the wrong name was written in one of her books (totally my fault), I came back on day two of the festival and brought her her very own Bucko! belt buckle! (a crowning achievement on my part, I thought). She was wonderfully appreciative, and told me that she'd link my Etsy shop in her blog, which she did! Amazing! Now here's my chance to repay the favour, although she may have a few more blog readers than I do at this point... just a few. :P


Bucko, was burned on Bubinga, has some red acrylic paint
and was finished with a clear matte spray.

Pins

I didn't make too many during this time period, but I'll show you them anyways!

Unstained versions of a Leafs pin and some specs pins. The
writing on the specs pin is 'They're real, and they're SPEC-tacular!'
The 'DAVE' buckle was made for my Bro. 
This dude was made before a friend and I went to a Leafs game
this past season... it didn't help them make the playoffs unfortunately.
An azure coloured stain was applied, and a white acrylic was used inside
the leaf.
Okay! That's enough of the early pyro section. :) Next up, my foray into Etsy!

Best,

Adam Grant
Man of Craft

Beginnings of M.O.C.

I've always loved to make things.

Whether it be a sewn door stopper for my Grandmother, or a knit afghan for my nephew, chocolate truffles for a party, or photoshopped Christmas cards featuring myself and my favourite feline... I've always been all over that business! I was able to express myself artistically, not to mention there was less of a strain on my wallet when giving gifts. :P

For the past couple years, I've been working through the beginnings of Man of Craft. It started with t-shirt screen printing,  and progressed through making a fabric flower brooch for my girlfriend when we couldn't find what she was looking for in stores. I made Christmas presents from cutting out hidden compartment books for my family (inspired from one of my favourite movies - The Shawshank Redemption, although nobody needed to break out of prison). Then I came across pyrography.  I combined this artform with an affinity for belt buckles and wood. A lot of research, online tutorials, butt-loads of support from some special people, and I'm now up and running in my own craft/art business!

I feel like this is the beginning of a life long adventure with crafting, where I can push my artistic limits, and create a body of work that I can be proud of!


Like I said, I started out doing some screen printing a couple of years ago. I even built my own 4-colour press! I've made a few shirts, but some modifications to the press need to be made before I can continue with anything other than one colour. Registration issues, you know :|

Anywho, I had lots of fun making shirts and learning the process of creating one's own artwork, screens, and applying ink. It's a lot of work, and pretty tricky getting the hang of everything but totally worth it when you see the final result!!  It's on hold for now, but the plan is to get the press up and running again within the year.

My Brother, Dad, and myself, wearing our matching t-shirts (one of my first screen
printing projects) up at the cabin, back in 2009. I was pretty pleased at how they came out!
My girlfriend and I were invited to a friend's wedding in April of 2010. It was springtime, and we obviously needed a flower as the perfect accessory for her dress! Simple enough, but all the flowers out there just weren't cutting it. Too huge, too floppy, bad colours... nothing was right. Until a trip to Fabricland gave me all that was needed. 

Poly ribbon, felt, thread, hot glue, and a brooch style pin was all that was needed!
(plus a couple hours of searching through online video tutorials and instructables)
Only needed one for the dress, but a couple were made.
Last year's holiday season took a lot of time, love, and effort to put together some presents. I couldn't have been happier with how they turned out! I didn't get any pics from those books, but I've got a few from my personal collection!


My first hollow book made for putting my various TV/DVD/CD
player remotes in, but shown above with my pal Voltron.


A slimmer book with a nice orange felt instead of black.
I currently use this to hold some of my M.O.C. pins and pendants


This one is great! It is two very handsome books combined to make
one fairly deep secret compartment. No felt inside, but I kinda like it that way.

This medium sized fella currently holds some of my various crafting
tools for leather stamping and stamp carving.

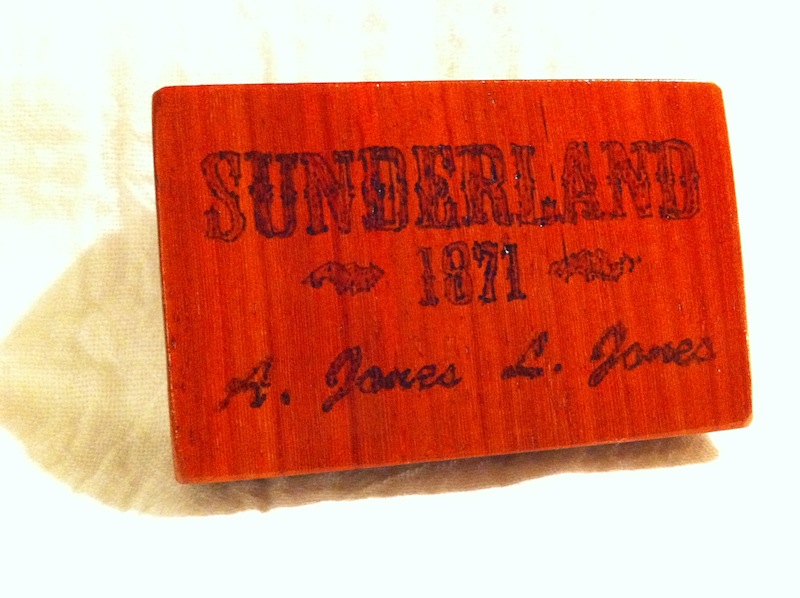
I've been focusing on pyrography ever since I came across it when looking to make my own belt buckles. For the most part, I really only see metal belt buckles in stores. I wanted something different. When I saw that you could burn images into them, I needed to try it! I was so excited that I tracked down a burning tool and some basswood from Lee Valley Tools and rushed home to get to work. 

After the wood was cut and sanded, I didn't even bother with making a polished design and ended up drawing my simple yet rough design right on the wood. I was a little hesitant to burn at first, but once I got going on a piece of practice wood to get the feel I didn't stop until I was finished. After applying the metal backing some stain was applied, as I wanted it darker than the (very) light coloured basswood. I finished it with some matte Krylon matte finish (spray on), and voila, my first buckle!


At about 4" x 2 1/2", it's a little bit of a monster, but as you can
imagine, it holds a special place in my collection.

At this point, I didn't have a clear idea as to where I was headed with what was to become Man of Craft, but I was inspired to just keep making and burning! As I go, I'll keep updating these pages with my progress. Any news that pertains to new products, art, shows, or M.O.C.-esque goodness will definitely rear its head here. I've already progressed from these beginnings, and so I've got some rapid-fire posts coming up in the near future. Stay tuned!

I've had a lot of encouragement from my family and friends, and so much support from my girlfriend, that it's hard to put into words how appreciative and lucky I am to have them around me as I go forth into the world as... the Man of Craft!

Best,

Adam Grant
Man of Craft